BetterMenus
What is Satchel BetterMenus
Satchel Better Menus is built to allow mods to use IMenuMods simplicity while allowing ICustomMenuMods flexibility and more
List of Better Menus Features
It essentially can do what ICustomMenuMod does and more but with much more easier and cleaner code.
- Easily create menus with 7 different menu elements - Horizontal Option, Static Panel, Text Panel, Menu Button, KeyBind, ButtonBind, Slider
- Update properties of elements at will by just editing a property and calling the update function.
- Hide/show menu elements at will. This allows "filtering" elements based on the current options selected by user. For example, if you have 3 gameplay modes in your mod, you can use this to only show the options relevant to that mode.
- A
MenuRowelement that allows you to place multiple menu elements side by side on a single horizontal line. - Blueprints for more easily creating commonly used configurations
Each of the features will be detailed below
1. Create Menus with 7 Different Elements
To create satchel menus, there are 3 objects we need to define first.
MenuScreenIt is the object that MAPI needs to display your screen to the user. The final return statement to create a modmenu requires you to return a menuscreenMenuIt is the object that satchel created to make making menus easier. This will be referred to asMenuRefto avoid confusion.Menu ElementIt is the parts that make up the menu (buttons, keybinds etc.)
To Create Menus: Make the class that inherits from Mod also inherit from ICusomMenuMod. You'll be asked to create a function GetMenuScreen. In that function do:
public class MyFirstMod: Mod, ICustomMenuMod //make the mod class also inherit from ICusomMenuMod
{
    // a variable that holds our Satchel.BetterMenu.Menu for us to use in the code.
    private Menu MenuRef;

    //function required to be created when inheriting from ICustomMenuMod.
    public MenuScreen GetMenuScreen(MenuScreen modListMenu, ModToggleDelegates? modtoggledelegates)
    {
        //Create a new MenuRef if it's not null
        MenuRef ??= new Menu(
                    name: "My Mod Name", //the title of the menu screen, it will appear on the top center of the screen
                    elements: new Element[]
                    {
                        //add elements here
                    }
        );

        //uses the GetMenuScreen function to return a menuscreen that MAPI can use.
        //The "modlistmenu" that is passed into the parameter can be any menuScreen that you want to return to when "Back" button or "esc" key is pressed
        return MenuRef.GetMenuScreen(modListMenu);
    }

    //a property requuired by the ICustomMenuMod interface to be implemented
    //since our mod is not IToggleable, we can leave it as is (leave it as null)
     public bool ToggleButtonInsideMenu { get; }
}
where you see //add elements here you can add elements based on what you need. the 7 elements will be detailed on Better Menu Elements Page
To add lets say a MenuButton that logs when that button was pressed you would do
new Element[]
{
    new MenuButton(
            name: "My Logging Button",
            description: "A menu button",
            submitAction: (_) => Log("A button was pressed")),
}
Below that you can add how many elements you want using new {Element Name}(),. If the element count exceeds 5, satchel will create scrollbar for you.
Notice how I didn't manually specify an Id. If it is not specified, the Id will be the name of the element
2. Updating properties of elements
Lets say you wanted to add another option in HorizontalOption or wanted to change what the menu button description says after you press it. All you'd have to do is
//find the element by ID.
Element elem = MenuRef.Find("My Logging Button");

//cast the element as a menubutton
BetterMenus.MenuButton buttonElem = elem as BetterMenus.MenuButton;

//change a property of the element
buttonElem.Description = "My New MenuButton";

//update the element to reflect changes in menu
buttonElem.Update();
This can be done anywhere and it will reflect in the modmenu. If you want to do it on MenuButton press, do this code in the submitAction Action parameter. Similarly, if you want to do it when the selected option in HorizontalOption is changed, do the code in ApplySetting Action
Example:
MenuRef ??= new Menu("Example Mod Menu",
        new Element[]
        {
            new MenuButton(// create a button very similar to above button
                name: "My Logging Button",
                description: "A menu button",
                submitAction: (_) => Log("A button was pressed"),
                Id:"Button1"),

            new MenuButton(
                name: "Change Text",
                description: "Click me to change text of above button",
                submitAction: (_) =>
                {
                    //find element by Id
                    Element elem = MenuRef.Find("Button1");
                    MenuButton buttonElem = elem as MenuButton;
                    buttonElem.Name = "My New MenuButton"; //change name
                    buttonElem.Description = "An old button with new properties"; //change description
                    buttonElem.Update();

                    Log("Name of above button changed"); //add a log to know my code worked
                }),
        });
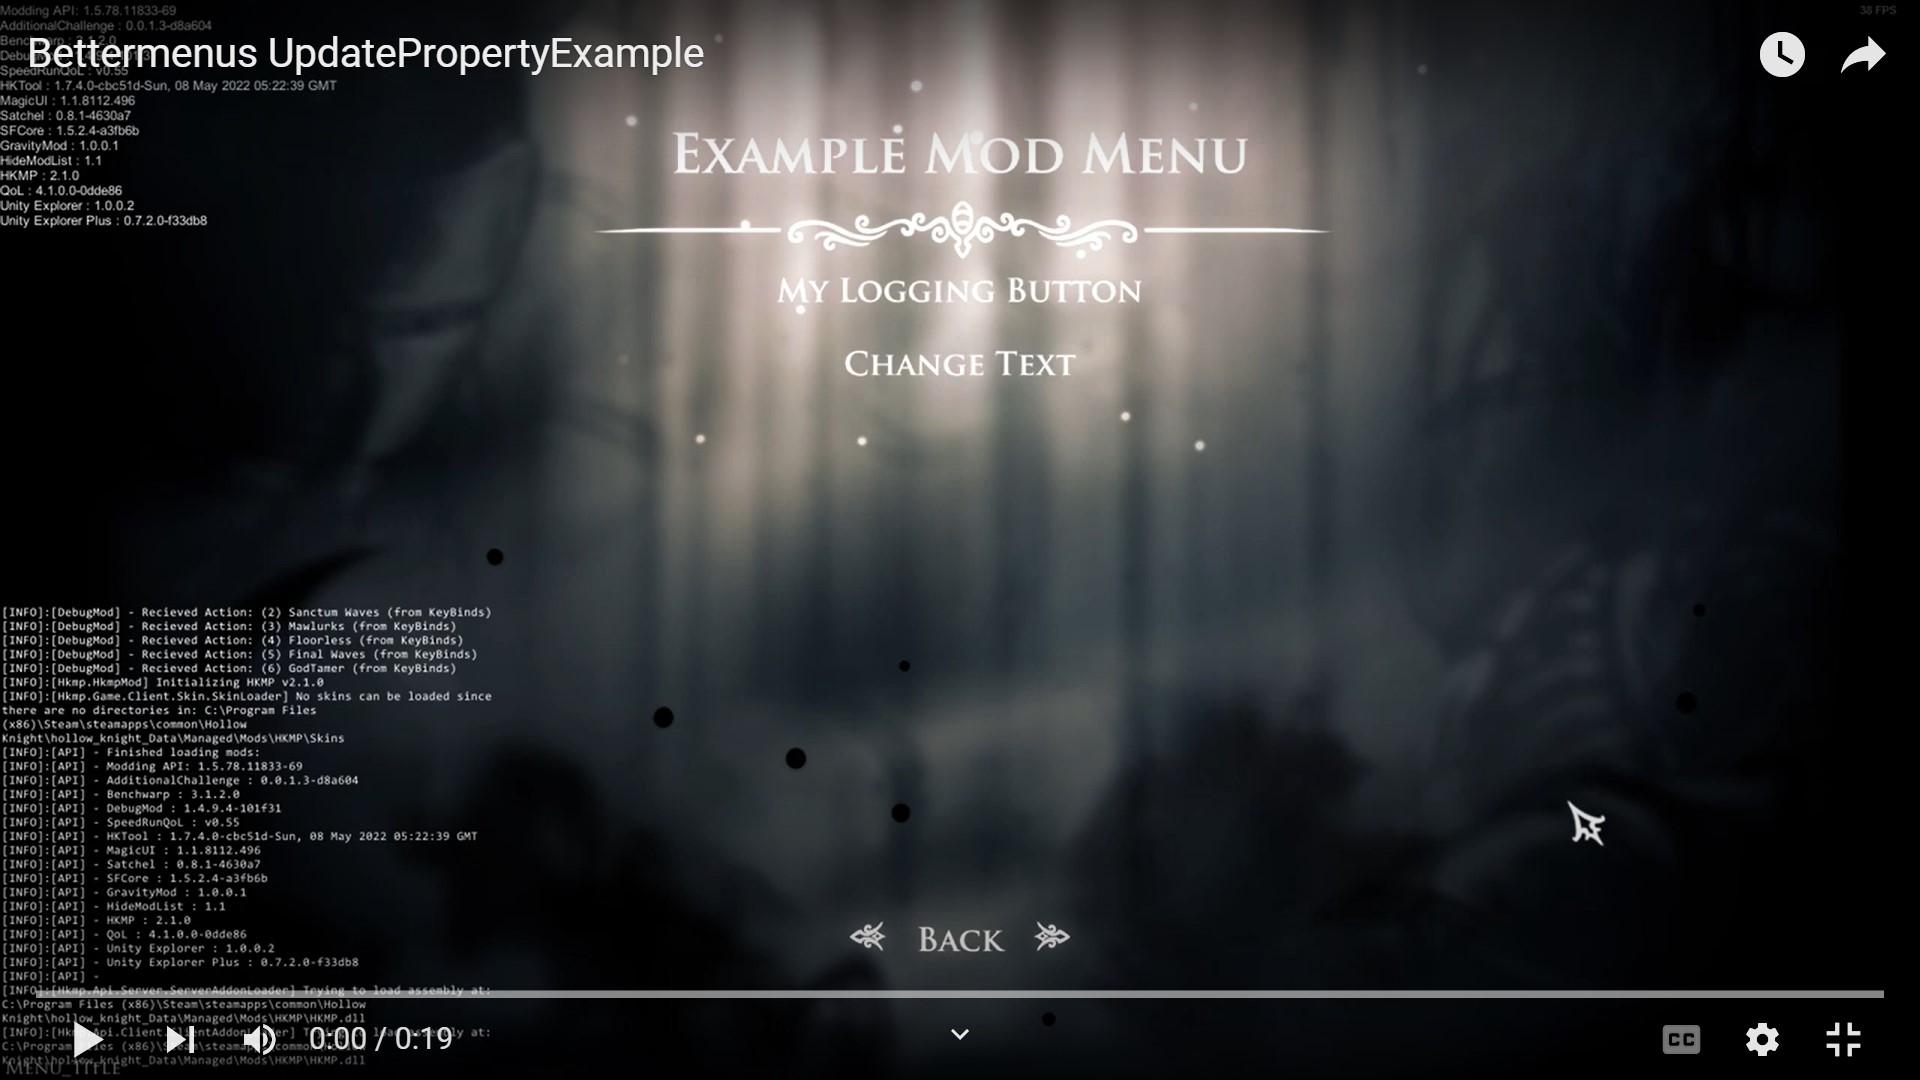
This code produces the following modmenu 
Notice: Since I'm changing the name, I manually specified Id so there is no confusion.
Note: The compiler might get an ambiguous reference between UnityEngine.UI.MenuButton and Satchel.BetterMenus.MenuButton. Best to do
using Satchel.BetterMenuson the top to avoid this error
3. The MenuRow Element
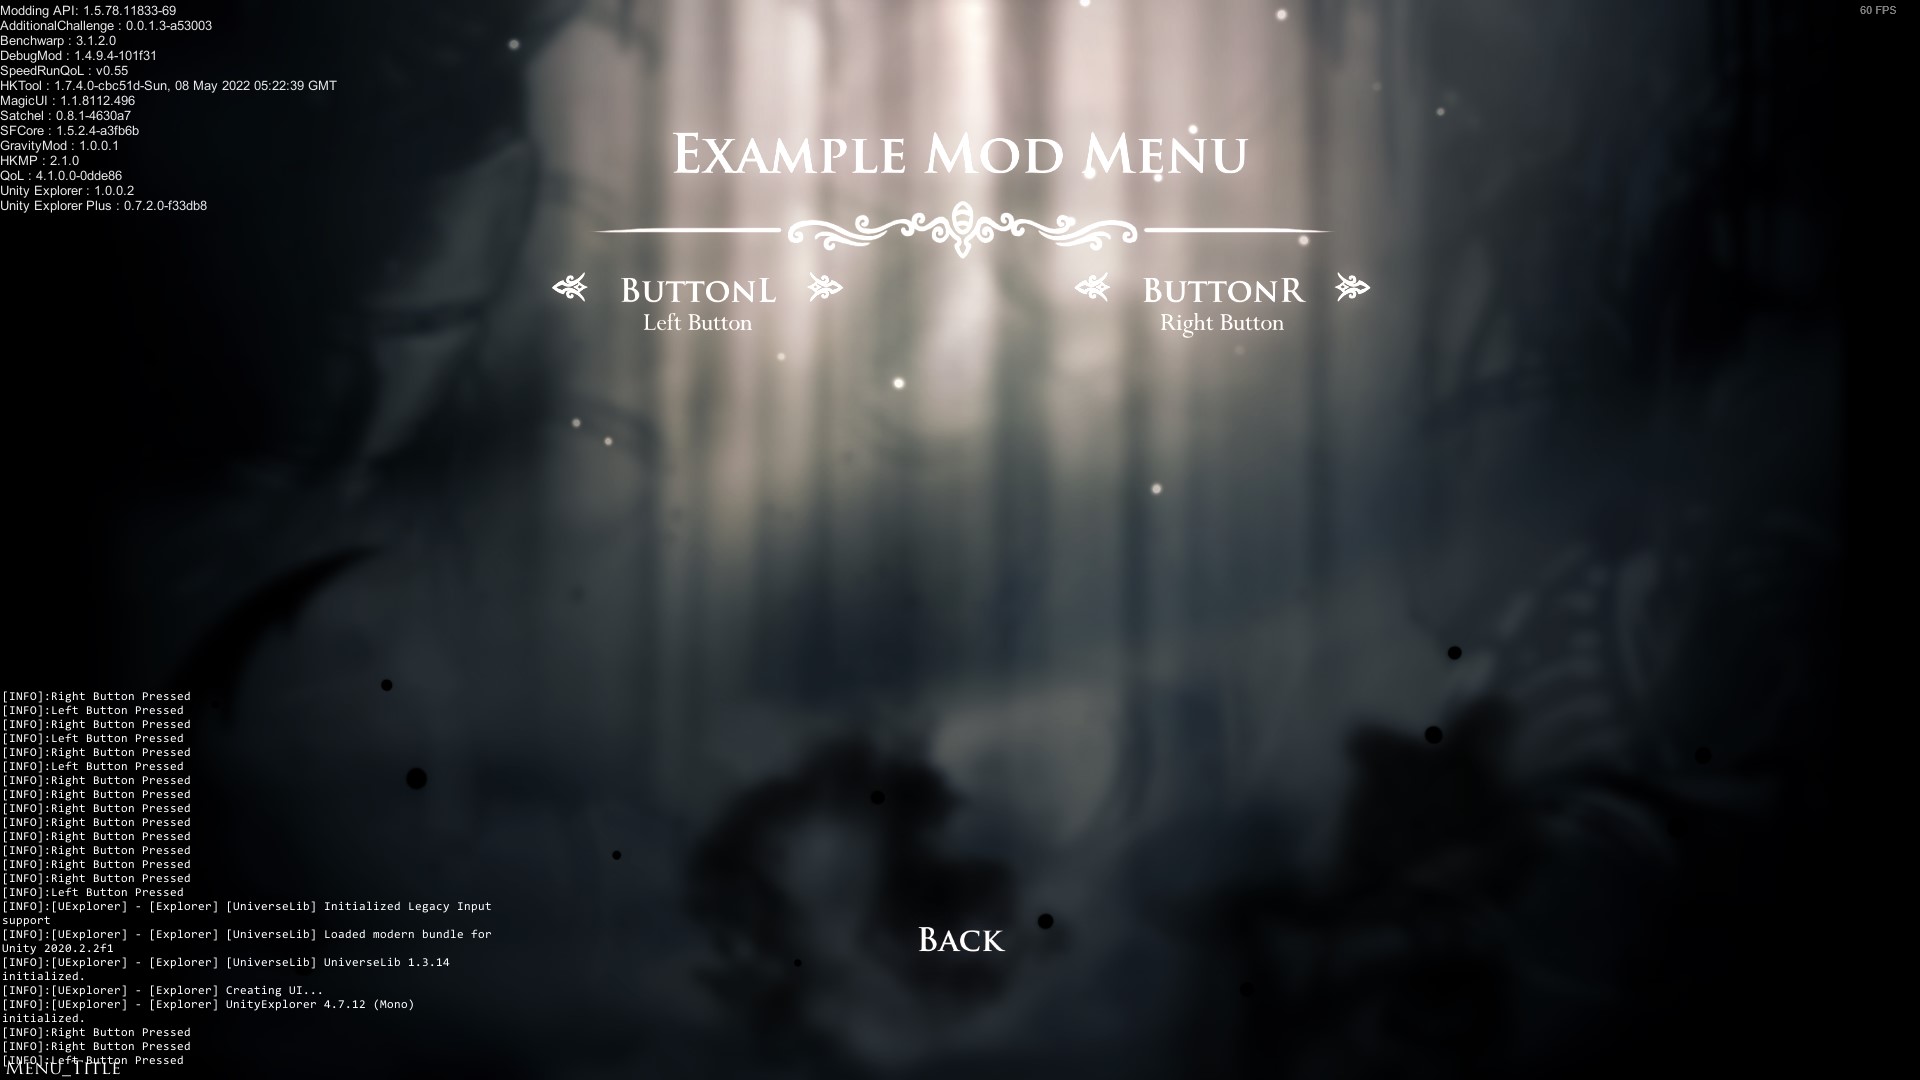
The Menu Row element allows the modmenu to have multiple elements in a single horizontal line. Mostly used if you have multiple buttons and you dont want to waste vertical space on all of them Example
MenuRef = new Menu("Example Mod Menu", new Element[]
        {
            //create a menu row with some menu buttons.
            new MenuRow(
                Row: new List<Element>() //the list of elements you want to add to the row
                {
                    new MenuButton(
                            name: "ButtonL",
                            description: "Left Button",
                            submitAction: (_) => Log("Left Button Pressed")),

                    new MenuButton(
                            name: "ButtonR",
                            description: "Right Button",
                            submitAction: (_) => Log("Right Button Pressed")),

                }, Id: "MyMenuButtonRow"), //second parameter is the id
        });

4. Hide/Showing Elements
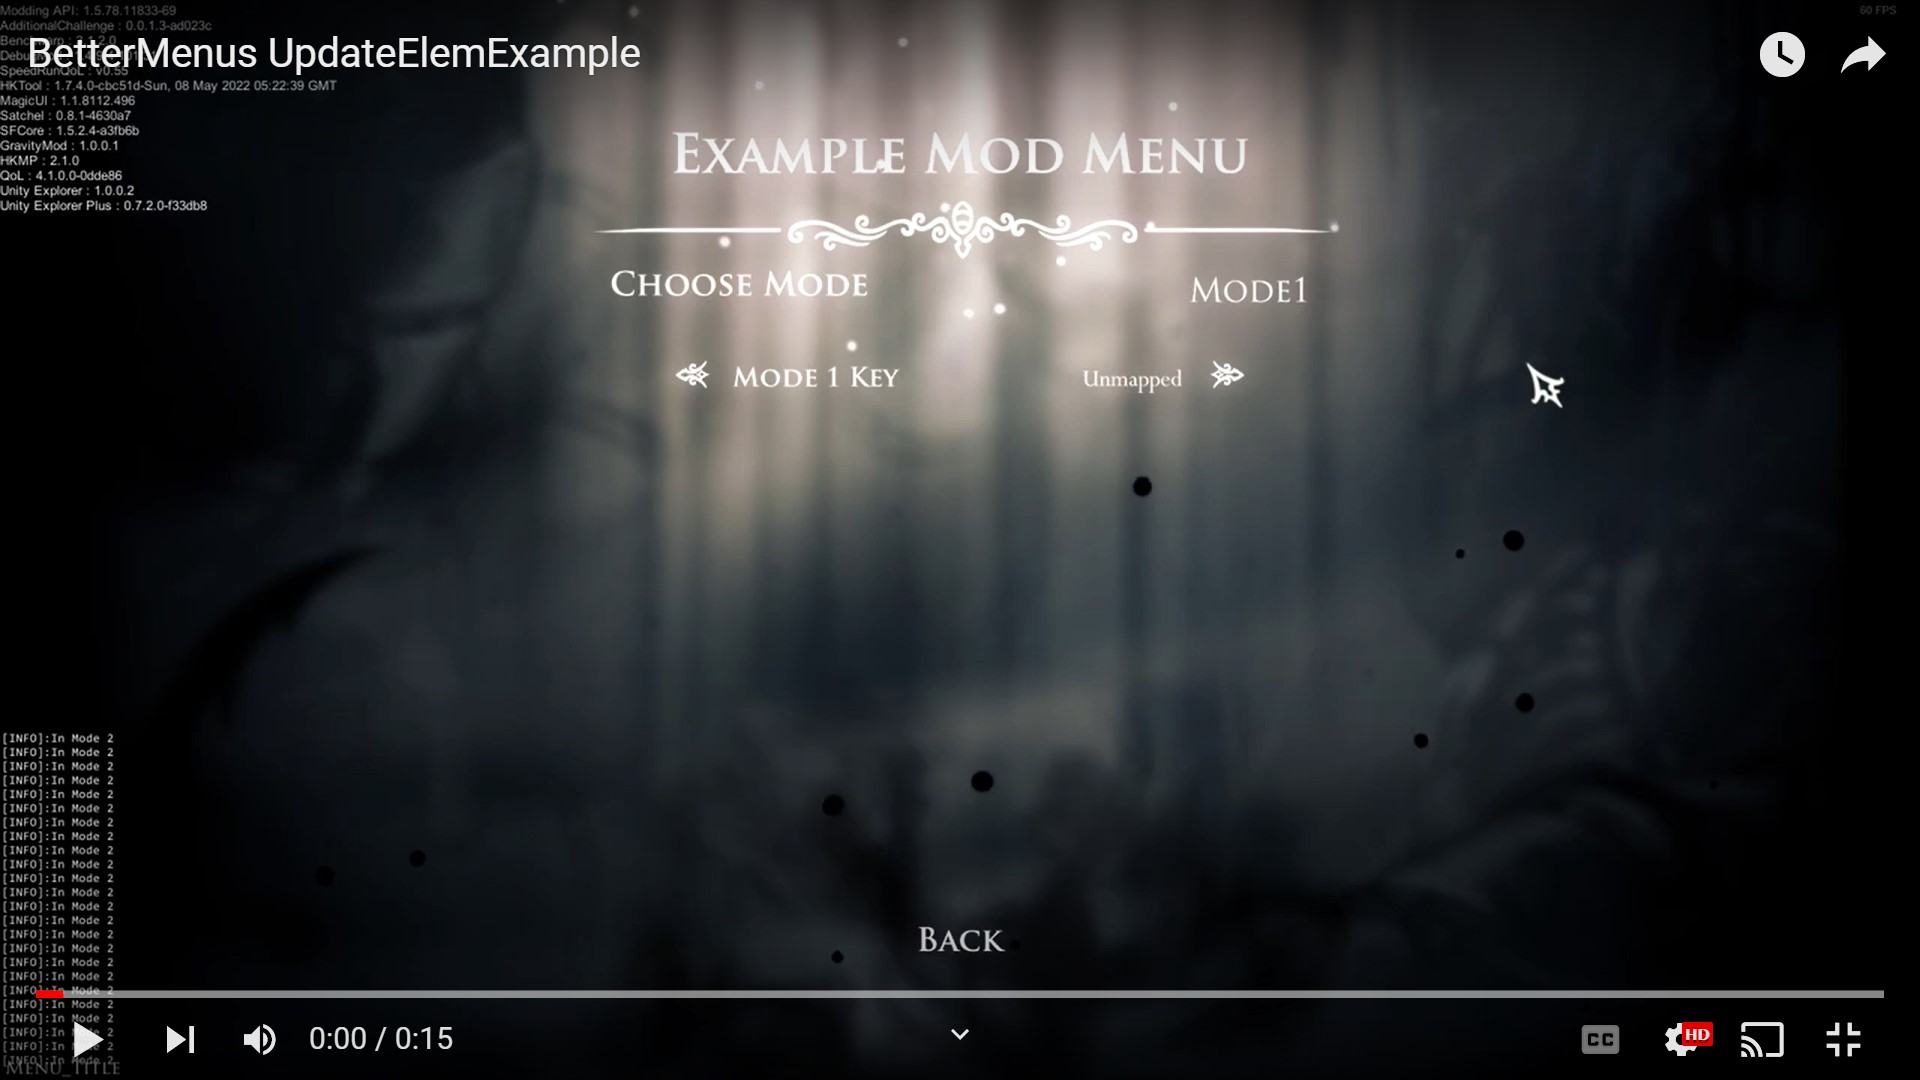
This feature is very useful for showing only relevant elements to the user based on the current selected options. Using this system is very similar to updating properties. Every Element has a property isVisible that controls whether not not its placed on next Menu Update. An Example will make this more clear.
Example:
enum Modes
{
    Mode1,
    Mode2,
}

Modes chosenMode = Modes.Mode1;
MenuRef = new Menu("Example Mod Menu", new Element[]
{
    new HorizontalOption(
        name: "Choose Mode",
        description: "Choose from the following modes",
        values: Enum.GetNames(typeof(Modes)), //get an string array of all values in Modes enum
        ApplySetting: (index) => //the function that will be run when a new option is set
        {
            chosenMode = (Modes)index;

            // Get the menu elements
            Element mode1key = MenuRef.Find("Mode1Key");
            Element mode2button = MenuRef.Find("Mode2Button");

            switch (chosenMode)
            {
                case Modes.Mode1:
                    mode1key.Show(); //show the keybind related to mode 1
                    mode2button.Hide(); //hide the button related to mode 2
                    break;
                case Modes.Mode2:
                    //Another option is to find the buttons and update its visibility property and call Update function.
                    mode1key.isVisible = chosenMode == Modes.Mode1;
                    mode2button.isVisible = chosenMode == Modes.Mode2;
                    MenuRef.Update(); //after updating the visibility property, update the menu so changes can be visible
                    break;
            }
        },
        loadSetting: () => (int)chosenMode),

    new KeyBind(
        name: "Mode 1 Key",
        playerAction: keyBinds.Mode1Key,
        Id: "Mode1Key")
        {
        //isVisible is a property of all Elements. However it is not available to be set in the constructor so we need to set it on instantiation
        isVisible = chosenMode == Modes.Mode1,
        },
    new MenuButton(
        name: "Mode 2 Button",
        description: "Does Something for Mode 2",
        submitAction: (_) => Log("In Mode 2"),
        Id: "Mode2Button")
        {
        isVisible = chosenMode == Modes.Mode2,
        },
});
 We need to notice a couple of things:
- If we use
Show()/Hide(), we don't need to call the MenuRef Update function. Additionally, theOnVisibilityChangeevent will be called. - When we directly edit the
isVisibleproperty, it is easier to deal with especially if there are a large number of elements. However, we need to manually call Update function for changes to take effect andOnVisibilityChangeevent will not be called. - When we created the 2 Elements, on instantiation we initialized the
isVisibleproperty manually. This is because we want only the relevant options to show, even on first menu creation
5. Blueprints
Blueprints is a class that has been created to help provide and ease the creation of commonly used functionality in modmenus. All the available blueprints will be detailed in Better Menus BluePrints Page
- Confirm Dialogue
- Key And Button Bind
- Mod Toggle
- Navigate To Menu
- Update Visibility
- Get Cached MenuScreen
Extras
These are BetterMenus information that didnt fit in the above tutorial but are still worth mentioning
- Notes on building pages
- Options To Add In The Menu Other Than The 8 Elements
- Adding elements in forloop
- Events